Creating Website Custom Audiences
Setting up your audiences to target with your future campaigns should be done at this stage – before you need them.
Follow the screen shot images below to get your first website custom audience (WCA) set up.
All you need to do today is get your head around the HOW. Tomorrow we will look into the WHY
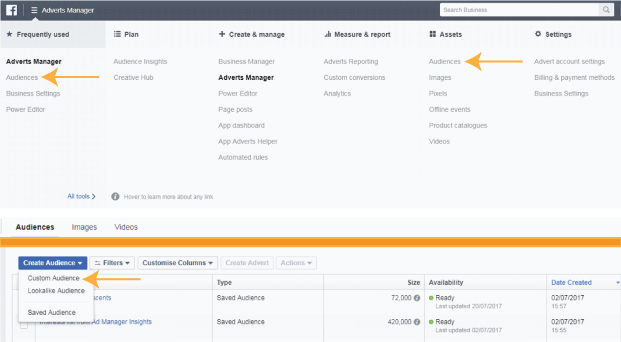
First, go to the three horizontal bars and select Audiences. in your dropdown box.
First, go to the three horizontal bars and select Audiences in your dropdown box, or click on ‘All Tools’ as you did to find the pixels section, but select ‘Audiences’ in the Assets column.
Once you are in the Audiences section, click on the ‘Create Audience’ button and select ‘Custom Audience’.
Easy so far, right?
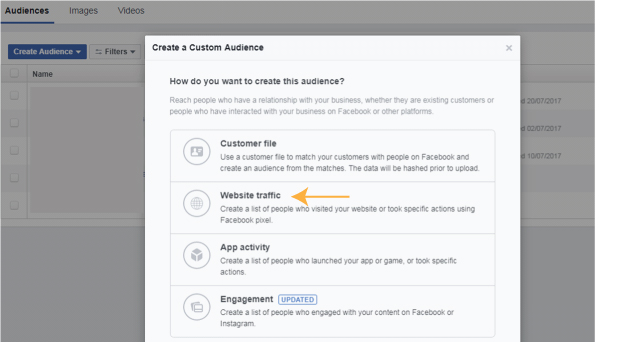
Select the ‘Website Traffic option. As you can see there are plenty of options in here to consider for future custom audience creation, such as engagement with your page or with a video or post.
Once you start working in here, you will see how the different styles of post become increasingly relevant to your marketing strategy – rather just for entertainment for the viewer.
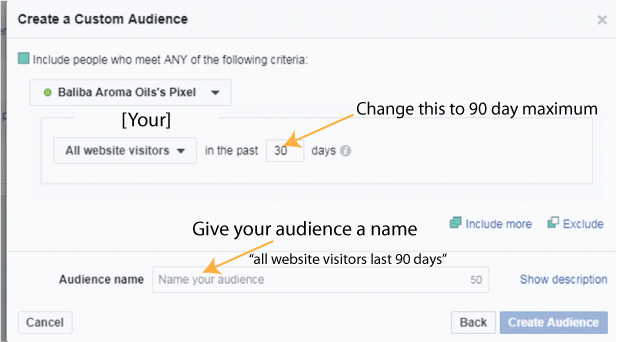
Finally, set up your audience – today we are going to go for All website.
Bear in mind that the audience may only be targeted after 100 people have met the targeting criteria so you have to drive traffic to your site or pages to ensure the criteria are met before using the audience – audience establishment is one of the first considerations in strategy creation.
So that’s us for today. Tomorrow we will look at why you might include or exclude a specific website custom audience.